Applying for an NBI clearance has become much simpler with the official online application system. This guide will walk you through every step of the process—from registering your account to claiming your clearance—ensuring you have a smooth and hassle-free experience.
Whether you’re a first-time applicant or just need a refresher on the updated 2025 process, we’ve got you covered. We’ll show you exactly how to fill out the forms, schedule an appointment, and pay the fee. With clear instructions and helpful tips, you’ll be ready to secure your NBI clearance in no time.
NBI Clearance Online Registration Steps (Updated 2025 Steps)
Before you begin, make sure you have a personal email address that you can access. The NBI will send your registration confirmation and payment details to this email.
1). Visit NBI Website and Register as New Account
First, go to the official NBI Clearance portal: https://clearance.nbi.gov.ph/.
On the homepage, you will need to register a new account. You’ll be asked if you have a previous NBI clearance issued from 2014 onwards.
- For new applicants: Check the “NO” box.
- For renewals: Check the “YES” box and fill in your old NBI ID number.
Next, fill out the registration form with your personal details. Tick the box to “Read and ACCEPT TERMS OF SERVICE” and then click Sign Up.

2). NBI Clearance OTP (One Time Password)
A pop-up will appear asking you to review your name, birth date, and email address. Review this carefully, as these details cannot be changed later. Click YES to confirm.
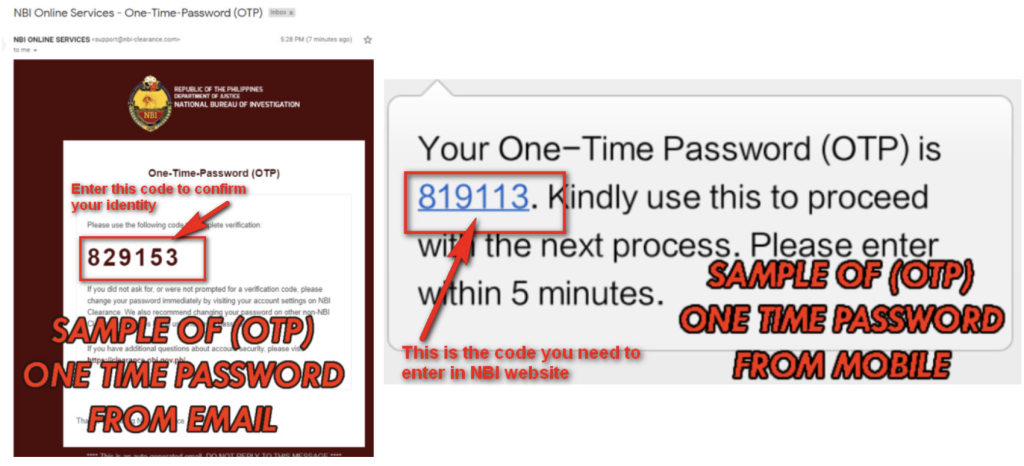
The system will then send a One-Time Password (OTP) to your registered mobile number or email. You have 5 minutes to enter this OTP to verify your account.
3). Log In to Your Account
Return to the NBI website and log in with your registered email and password. If you have login issues, use the “Forgot Password” option to reset your password.

4). Fill The Applicant Information
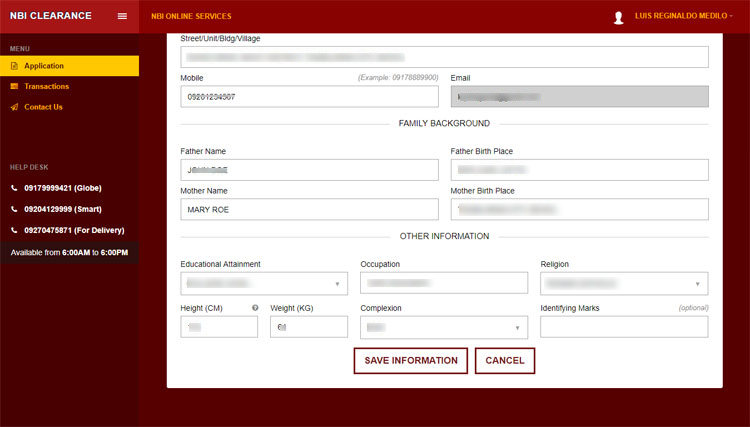
Once logged in, you’ll be taken to the APPLICANT INFORMATION page. Fill out all the required fields completely and accurately. This includes:
- Personal Information
- Contact Details
- Family Background
- Other Information
When you are finished, click the Save Information button. The system will show you a summary of all your details. Review everything one last time. If you see a mistake, click the EDIT button to correct it.
5). Fill The Applicant Information
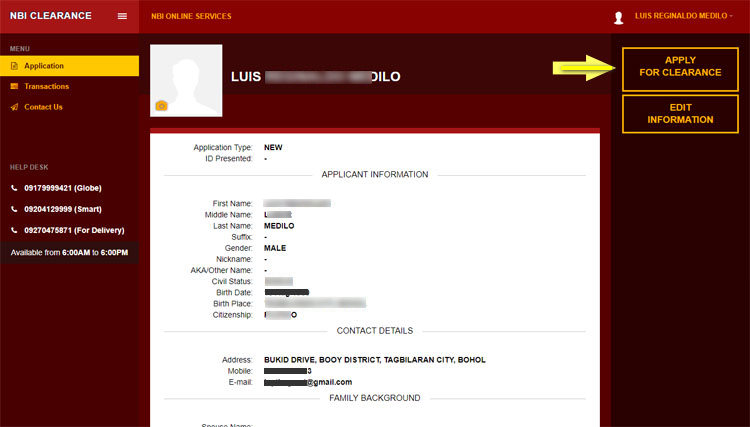
Review everything one last time. If you see a mistake, click the EDIT button to correct it. Once you’re sure everything is correct, click the APPLY FOR CLEARANCE button.
6). Schedule Your NBI Appointment
Now you need to book an appointment at an NBI branch for your biometrics (photo and fingerprinting).
- Choose an NBI Branch: Select a branch that is convenient for you from the dropdown menu.
- Choose a Date and Time: A calendar will appear showing available slots. Choose a date and time (AM or PM) that works for you. Slots are first-come, first-served, so it’s best to book in advance.
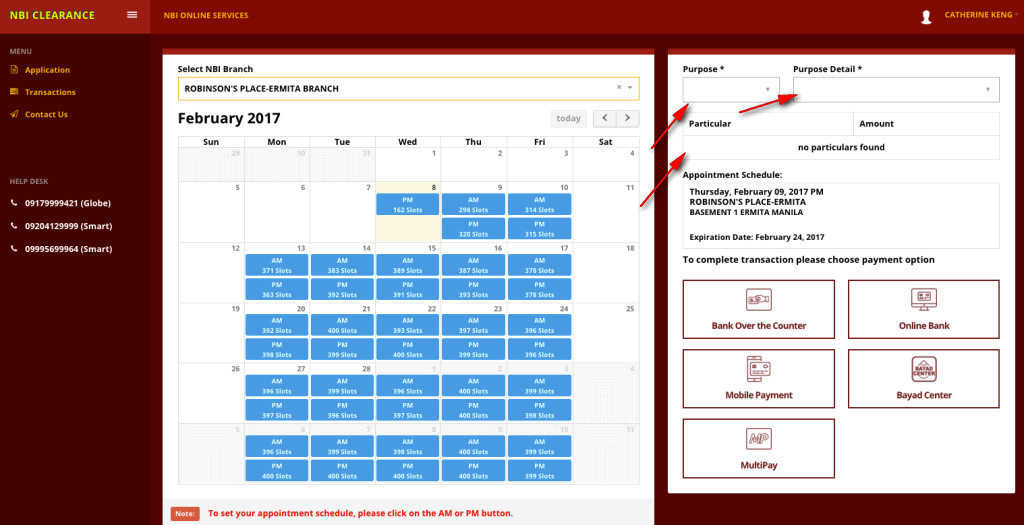
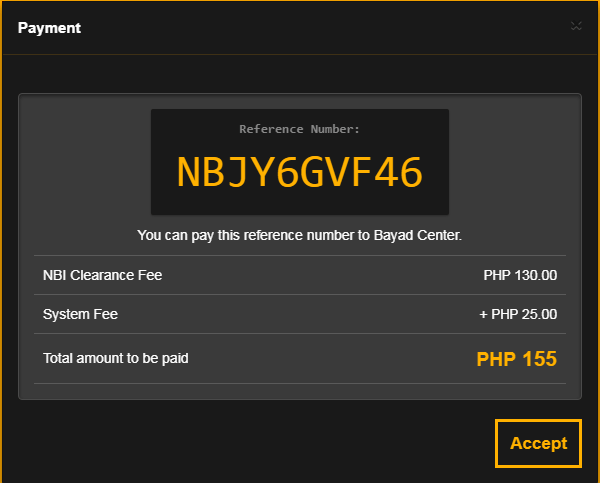
The screen will show your appointment details and the total fee. The standard NBI Clearance fee is ₱130, plus a ₱25system fee for a total of ₱155.
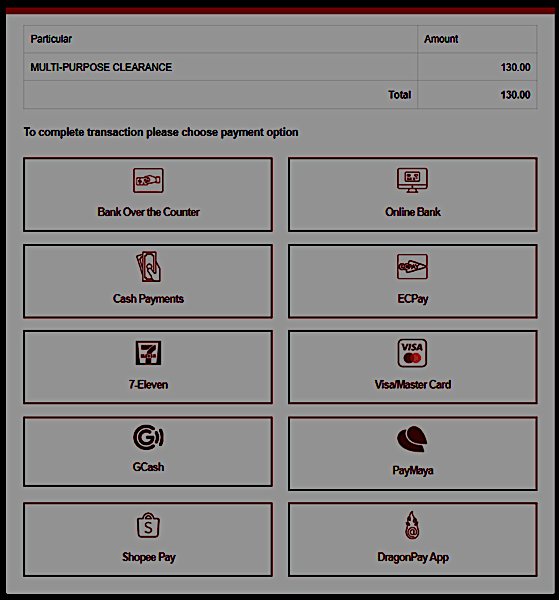
You can pay through various channels:
- Online Banking: Most major banks are supported.
- Mobile Wallet: GCash, Maya, etc.
- Bayad Center / MultiPay / ECPay: Pay over-the-counter at these outlets.
- 7-Eleven: Pay via their CLiQQ kiosk.
Select your preferred payment method. A reference number will be generated. Take a screenshot or write down this reference number, as you will need it to make the payment. Pay before the indicated deadline.
After paying, log back into your NBI account to confirm your status is updated to “Paid.”
8). Prepare Your Documents
For your appointment, you must bring two (2) valid government-issued IDs. The application form will ask you to select which ID you will bring.
Accepted IDs include:
- Philippine Passport
- Voter’s ID or Voter’s Registration Record
- Driver’s License
- SSS ID / UMID
- PhilHealth ID
- TIN ID
- Postal ID
- PRC License
- Alien Certificate of Registration
- NSO/PSA Authenticated Birth Certificate
Once you’ve selected the ID you will present, click the I AGREE button.
9). Appear at the NBI Branch on Your Appointment Date
Go to your chosen NBI branch on your scheduled date and time. Remember:
- Printing the application form is not necessary.
- Bring your two valid IDs and your payment receipt/reference number.
- Follow the first-come, first-served policy inside the branch. Priority is given to PWDs, senior citizens, and pregnant women.
An NBI staff member will take your photo, fingerprints, and digital signature.

After your biometrics are taken, the NBI will print your clearance. If your name is unique and has no issues, you can receive your clearance within minutes.
What is an NBI “Hit” and What Should I Do?
However, you might be told you have a “Hit.”
- What is a “Hit”? A “Hit” means you share the same name as someone who has a criminal record in the NBI database. This is a common occurrence and does not mean you have done anything wrong.
- What to do? If you have a “Hit,” the NBI staff will ask you to return after 5-10 working days. During this time, they will manually verify your identity to clear you. You will be given a claim stub with the exact date to come back and pick up your clearance.
NBI Clearance Most FAQ’s
Log in to the official NBI website. If you’ve forgotten your login details from a previous application, it’s often easier to register a new account as a first-time applicant.
Yes. You can have a representative claim your clearance using an authorization letter. The letter should state their name and their relationship to you. They must also present their own valid ID and a copy of your valid ID.
No, almost all government offices, including NBI branches, are closed on weekends (Saturday and Sunday). Operations are from Monday to Friday during office hours.
You can edit your personal information by clicking the “EDIT” button before you schedule an appointment and pay. Core details like your name and birth date cannot be edited after initial registration. If you made a major error, it’s best to create a new account with the correct details.
If you accidentally closed the window, just log back into your account on the NBI portal. Go to the “Transactions” menu. You will see a list of your transactions, where you can find your reference number and reprint the application details.
You can see AM and PM buttons when scheduling an appointment on the NBI website. Select the date and time when you can see AM and PM buttons.
Conclusion:
Following this guide makes applying for an NBI Clearance online a straightforward and manageable task. Remember to double-check all your information, pay on time, and bring your valid IDs to your appointment.
Your NBI Clearance is valid for one (1) year from the date of issue. Keep it safe, as you will need it for employment, travel, and other legal requirements.

